Sunday, 31 March 2013

CAPSULE WARDROBE

Love the idea?......or hate it?
I've always quite liked it. Not sure if I could ever empty my wardrobe enough to do the 24 pieces only with just seasonal additions as I think I would get bored wearing the same colours. Though truth to tell like many of you I suspect, I do tend to pick the same old favourites time after time. Especially if I am feeling in a not very confident or 'ugly/old' frame of mind that day.
However I do think this works brilliantly for long weekends away and holidays.
The idea of having less to pack and only needing 2 bags and 2/3 pairs of shoes (depending on the style of break) is one I love.
  I found this very true on my recent trip to Scotland. What I needed was warm comfortable clothes with a few smart casual additions for family meals out.
I decided on an orange/ brown/teal theme based around this pretty scarf.......

one of my TK Maxx bargains and this is what I came up with.......

Travelling by train.....

Orange 3/4 coat a CC bargain about 2 years ago, rust knitted tunic top, Peacocks best but oh so comfortable, straight cut jeans, brown boots, teal  tote bag and 'the scarf'.

Shopping, short walks, relaxing and having a good natter......


 Teal sweater, teal jeans, orange vintage necklace,  then orange sweater, light tan chinos, teal necklace with boots and bag and scarf as before plus teal/tan Mary Jane's

Couple of meals out.....


 Yellow/teal tan tweed jacket, brown dress (recent make) natural/orange small shoulder bag, boots and necklace as before....

Teal dress (M & S outlet bargain £9.99) Teal tights, bag, shoes and necklace as before....

So 2 tops/ sweaters, 3 pairs trousers/jeans, 1coat, 1 cropped jacket, 2 dresses,1 pair boots, 1 pair shoes and 1 large and 1 small handbag. Not forgetting the scarf and a few pieces of jewellery. All of which packed into a medium size holdall together with toilet and makeup bag, underwear and hot brush......

And although I sort of knew what I wanted to wear with what, I had several options for every day with just these few clothes..... Some further ideas......


And I know this may seem a bit crazy to some, but I even make a note of the different combinations I can make, so that if I am suddenly invited out I can decide at a moments notice what looks good with what. (Of course I always try on the pieces together first just to check they actually work). A top that may look stunning with one skirt may look awful with another in a different style!

We are only about 4 weeks away from our next break and I have already been toying with my outfits for that. A combination of sightseeing, walking and eating out. I think I will go for navy, grey and chartreuse/lime this time as I have a pretty good selection of clothes in those colours. If this is something that people like to see I may do a post on that too!

Hope you are all enjoying your Easter break, however you celebrate. We have been doing our favourite thing....enjoying an afternoon and tea with our family....

Speak Soon
TTFN
Jenny xx


Saturday, 23 March 2013

PULLING THE WHITE RABBIT OUT OF THE HAT........

Literally..................

Just before I went on my Scotland trip, it was my grandsons birthday and when his mum Mrs Kipperchops said he was going to have a magic party I didn't realise at first that she was being serious. However apparently Master Kipperchops is quite into magic and luckily they had found the perfect entertainer to do the job....meet

BURGER BILL.....the most amazing entertainer and controller of hoards of children I have ever met!


 He really entertained the children for about 2 hours; an hours magic show was followed by their tea, which he even helped serve, and then continued with party games for another half hour or so. No falling out no injured children and not a grizzle among them

Mum is a bit of a whizz when it comes to theming things and when she does something she goes the whole hog. I'm not talking wasting money, which as a young mum of two, running her own business is not an option, I'm talking organising a brilliant do with little cash, loads of ideas and lots of hard work ( and of course roping in willing relatives and grannies who will do anything to help).

So from a little magic bean a huge beanstalk grew.........

Entertainer ....tick (the only extravagance and worth his weight in gold, though for what you get it was not so extravagant)

Food....bought when things were on offer or made by mum, Aunt and granny........


Decorations...sourced as cheap as chips on the Internet or made.....


Party bags....black and white paper bags filled with bargain magic tricks and homemade treats


 Cake...homemade by mum...... and they (mum and dad) even made and painted the giant wand!.....


 And finally a young magicians apprentice couldn't perform his role properly without the right attire...well could he?.....


The cape was made out of red and black sheeting and the 'cards' are embroidered badges which were attached by hand so that they could be removed for the cape to be used for Halloween or as a witches cape at a later date! That was great fun to do!


 And so what was the birthday boys reaction..........

MAGIC !!!


TTFN
                                                                            Jenny xx


Monday, 18 March 2013

A LITTLE BIT OF SPRING SUNSHINE......Please!

I've just returned from a little trip to bonny Scotland to visit my middle sister. It was quite an important visit for me as it was the first time that I had seen her since she had finally been diagnosed as having a severe back problem. In short her discs are collapsing! And I am sure you can understand that having complained of  awful back pain for over 40 years and being rather too often dismissed as 'putting it on' she is a bit peeved ( I'm trying not to swear here so replace peeved with the strongest word you would use) at being told it is now too bad to operate and being offered every mechanical assistance that's going. Shut, Gate, Horse, Bolted springs to mind. But all that said I have to raise my hat to her. No she hasn't suddenly stopped living her life, has not stopped doing as much as she is physically able without assistance, has not confined herself to barracks and is trying to carry on as she has had to for those past 40 years. So my visit was lovely. I was a little reassured by her independence, yes she has given up her car, but is putting her bus pass to good use. We had some lovely walks, a little slower this time but still we walked and enjoyed some good old natters and lots of tea ( and whisky...well it would be rude not to in Scotland...right!) So I am afraid unlike my other travels I have not returned with zillions of beautiful photographs as you couldn't see much in this....


 and the only bright shot I got was from the train on the way home.....


 but even that was surprising as my view went from this....


to this...


..... in the space of a few miles.....what is happening to our weather....

And since I have been home it has been much of the same...rain, then fog then snow and hail and back to rain again....Oh how I long for those first warm spring days, winter seems to have lasted for ever......

But tucked up in my snug sewing room I have been dreaming of lovely sunny days .....if only in my choice of projects. As you will know if you have been here before I love to make little girls party and wedding shoes and so from time to time I search the web to try to find the kind of dresses I see my little shoes paired with.  And that's the problem....I cant!
So what do you do but design and make your own....!......and so here are the first peeks at what I soon hope to offer in my shops........do let me know what you think...I value your opinions.....


The dresses have a full circle skirt and are fully lined. The underskirt has two layers of scalloped organza attached. The hand made organza flowers are attached to the satin sash but could be mounted on brooch fastenings so that can be removed and used separately. So far I have completed this green sample and have a brown spot and red spot version cut out. I intend to make matching shoes and am toying with making dresses to match these.......


I am thinking of offering the new dresses from  12 months to 4 years, but this is all just an idea at the moment.......and my little bit of spring sunshine......

Hope it finds you all soon though I am not holding my breath....

TTFN
Jenny xx

Tuesday, 19 February 2013

PUTTING YOURSELF UNDER PRESSURE...........

Why do we do it?  Constantly putting ourselves under pressure to achieve something. I like so many had so much pressure when I worked that eventually my hair started coming out! Yet here I am retired, well, not too poor and possibly the envy of a lot if today's workers and I am still giving myself time schedules as if it really mattered to anyone but me. Daft I know, but how to cure myself I have no clue.
At the moment I am cross with myself because my decorating mojo seems to have left the building. Whether its the combination of short dark days, freezing temperatures and the occasional snow blizzard,


(A pain but oh so beautiful)

or just a case of too much in a short space of time before Christmas. Whatever the reason I cannot motivate myself and so I have decided to stop beating myself up about it and to concentrate on those things that have to be done, customers orders and decorations for our grandson's birthday party at the end of the month and then to just do whatever takes my fancy!

At the moment this means dressmaking and alterations.
My wardrobe cull is going well, several coats and dresses sold on EBay and more ready to go, and a fair pile for the local charity shop. All good stuff I hasten to add, having watched that Mary Portas programme on the tat that is offloaded to many of the shops, and I am trying to stick to my new mantra one in one out!
So during the cull I came across several items I really liked, but no longer fitted. Some were colours which I have had to really search for and I was loathe to get rid of. So what do you do but become your own alterations shop and I am very pleased with the items I have done so far. One pair of dark brown bootleg cords now straight leg, one pair of rather wide legged tweed trousers which not only fit but are a much better width for my small frame (and height! being decidedly vertically challenged),  and the chartreuse skirt which I made a while ago now several inches smaller. So three more items I don't have to replace.


And then  I came across this Vogue pattern from several years ago, which I never made up.

 Vogue 2659 

 So I rummaged through my boxes of fabric and found some fairly firm brown jersey and in a couple of hours had this......


 So I don't quite look like the model, but I love it and am so taken with the fit have found this rather super piece of stretch denim fabric to make up the skirt and am trying to decide what colour tee and jacket to make.


 Not too sure about the crops though I suppose I could again use stretch denim or something similar to make them a bit more classic for this old bird.

So you see although I am a bit sorry not to be reporting on my brand new bedroom, my hands will never be idle, nor I suspect will my wardrobe be empty!!

Off to track down some lovely gabardine, and perhaps some striped jersey.............

TTFN
Jenny xx

Tuesday, 5 February 2013

BAG YOURSELF SOME VINTAGE STORAGE......A Tutorial....

Hi lovely sewers
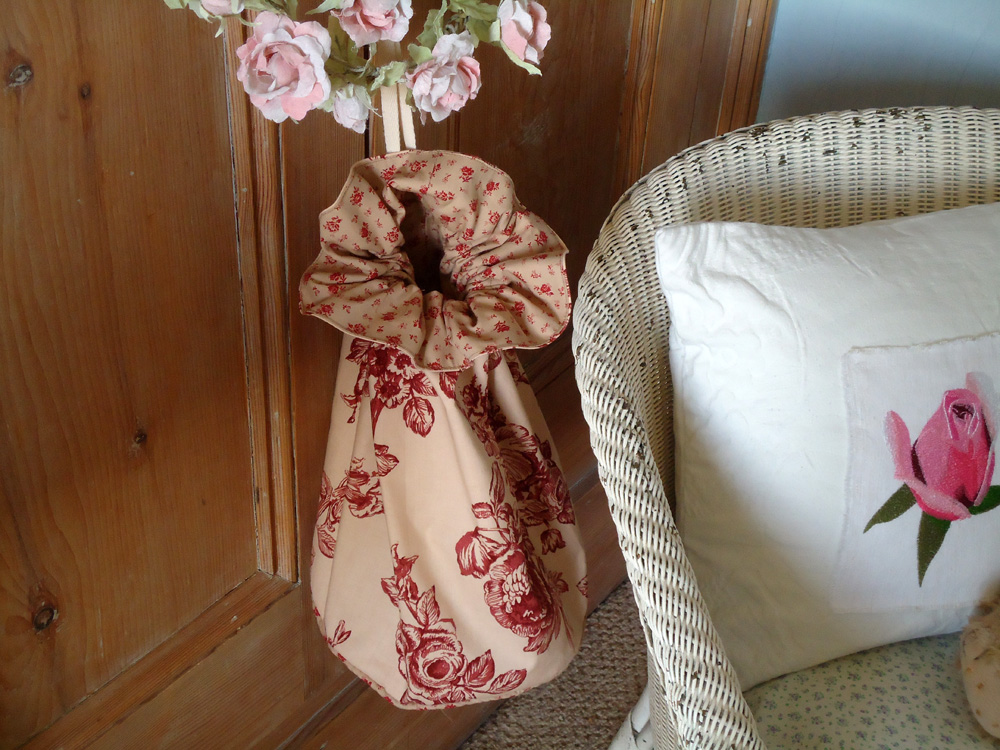
This week as well as churning out candy bunnies, I have been giving a bit of thought to the bedroom makeover. I have a walk in wardrobe, and in it storage baskets in a frame in which I keep all my lingerie and hose. However my socks and tights are fighting for space so I decided I could do with a drawstring bag to add to the storage and which could be hung decoratively on the built in cupboard doors.
So I chose a couple of pieces of the fabric I had already sorted as possibilities for the room, and set to.

This is how I did it....a little tutorial.....

You will need..

1/2 yard of cotton fabric, either medium furnishing weight or patchwork fabric for the outer layer
1/2 yard of a contrasting or toning cotton, similar weight. ( both about 45 inches wide ) for the lining.
3/4 yard to 1 yard  of piping cord.
1 yard cotton tape, ribbon or string.
Matching thread.


First find a template to draw a 10 inch circle. I could only find the base of a 9 inch cake tin so used that and added 1/2 inch all round for my seams. Starting at the edge of your fabric cut one circle out of each of your fabrics.
Cut a rectangle from each fabric 14 inches by 27 inches
Cut two strips from the lining fabric, one 28 inches by 1 1/2inches and the second 28 inches by 2 inches.


Take the 1 1/2 inch strip and fold in half along the length, wrong sides together. Take the piping cord and place it right up against the inside of the fold. Starting a couple of inches away from the end and using a zipper foot stitch as close as possible to the cord and continue to within 2 inches of the end of the cotton strip.


Take the circle cut from the outer fabric, and starting where your stitching began, carefully pin the corded strip around the outer edge of the circle keeping the cut edges matching. It is usual to have binding cut on the bias when using piping cord, but this does take rather a lot of fabric and as I was using some vintage fabric, I didn't want to waste any. For this project it worked OK, even though I did not snip into the curved seam, but I would not recommend this for anything on a bigger scale.
 

When you have pinned all around, again using the zipper foot carefully stitch the piped strip around the circle again starting and finishing where your original stitching on the tape began and ended. You should have a small amount that is not yet attached. This is where you cut the cord so that it meets flush and turn in one end of the tape and let it overlap the other end to give a neat join. Pin when done and finish stitching this portion.


Next take one of the rectangles and with right sides facing sew a half inch seam down the short sides, creating a tube. Do the same with the lining piece. Press the seams open.


Now you will join the outer tube to the already piped circle. With right sides facing pin the tube to the outer edge of the circle and again using your zipper foot stitch close to the piping.
Next with right sides facing join the lining tube to the lining circle in the same way, this time you need a 1/2 inch seam as there is no piping to sew against.


Having the outer bag piece inside out, and the lining bag piece the correct way, slide the lining inside the outer bag. The right sides should now be facing and the top of the bag pieces level.. Stitch around the top with a 1/2 inch seam leaving about 4 inches unsewn to turn the bag right sides out.  Pull both parts of the bag through this gap and then push the lining down inside the outer bag and press the top edge before top stitching all around closing the gap as you do.


Take the remaining 2 inch strip and fold it in half lengthwise with the right sides facing. Stitch the long edge with a 1/4 inch seam. Fasten both ends of your stitching securely as you will now turn this tube right side out. Press the tube with the seam centred at the back. Turn one short end in and neaten with hand stitching.


Now mark a line on the outer bag about 2 inches from the top all around. This is the placement line for the  casing you have just made. Pin the top of the casing under this line starting with the neatened edge about 1/4 inch away from the back seam, and finish the same distance from the other side, if necessary cut the casing to fit allowing about 1/4 inch to tuck in and neaten as you did at the beginning. Attach the casing by stitching close to both the top and bottom edges ensuring that you secure it well at both the start and end on each row of stitching as this is where you will thread your ribbon or tape to draw the bag closed.


Finally thread your tape through the casing and then either knot or neaten the ends before knotting them together and voila....


one useful drawstring bag for all manner of things....hosiery, hair equipment, face cloths in a bathroom...the uses are endless and the look too depending on your fabric choice. You could even use lightweight velvet and store your jewellery, or use fun 50s nursery prints and use as pyjama cases.

I would love to see your versions if you decide to have a go......

Must be wine o'clock by now so will bid you all goodnight and happy sewing.

TTFN
Jenny xx